My hexbeam was made either side of Christmas 2009 and raised to 24 feet second week in Feb 2010.
Since I had to try and buy suitable copper wire in NZ it seemed expedient (and lazy) to buy a "plug and play" set of wire elements for 20, 15 and 10 mtrs. So I took delivery of the wires from Anthony David far away in Wales. The SWR numbers must be a tribute to his measurements! I have checked these SWR readings several times and I would forgive anyone for thinking like I did. I cannot fault the numbers though, I tried. Tests were at 16 ft up, at 24 ft it is just as good. Perhaps being only a 3 band hex has helped to optimise the SWR. However - it would seem hard to improve that most valuable feature.
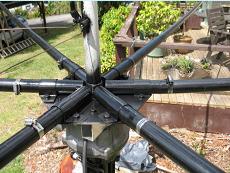
The glass fibre poles were made by CTS in Auckland, fishing rod experts. They are very strong and very light, and a lovely present from my XYL. I called for 11 foot lengths and had to extend them at the hub by about 6 inches. This was done with wooden dowling turned in the lathe to fit well. It also added much strength just where needed. If ordering again I would call for 11'6" but still re-inforce (say 8") with something. The dowling was made a push fit into the tubing for about 6 inches. Jubilee clips (stainless steel) are placed to take any unwanted stress from the thin walled glass fibre tubes.
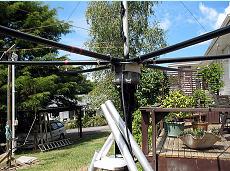
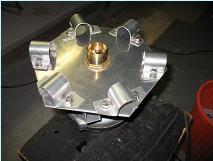
Since ss U bolts were about NZ$18 each I elected to make aluminium saddles using what I had. They also spread the load nicely where the spreaders clamp onto the hub. The center flange fitting is a brass bathtub drain-plug fitting. At only $10 (sale price) it was ideal. Again a skim with the lathe allowed a perfect fitting of the center plastic tube into the brass pipe stub.
At this stage it seems I had achieved one important objective. I had kept the weight down very well.
Pictures tell all. Click on them for a bigger view.
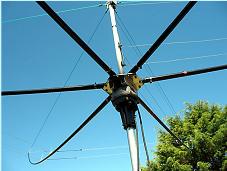
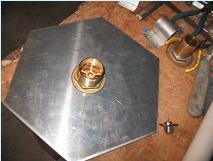
The hexagonal hub plate is 5mm ali and 250mm across the flats. The spokes inside the brass drain hole were removed to make easy access for the RG213 feed. The flange underneath is fixed, the brass nut is seen on top here.
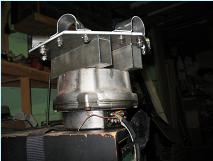
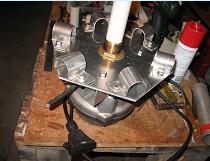
The rectangular ali' allowed a means to bolt the "old" Yaesu G400 rotator to the hub plate with ss nuts/bolts whilst leaving space for the RG213 to go up the centre.
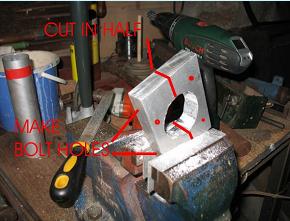
Shows aluminium saddles and ss nut/bolts. Saddles are easily made using a solid pipe of the right diameter and a vice. Don't make them too narrow, spread the load. The brass bath tub drain fitting was a lucky find indeed.
The plastic pipe was finally gripped with a 'pk' to hold it whilst moving about. The RG213 sticking out was replaced with a much longer piece and an inline connector fitted. Only wish I had fitted the ferrite beads but still waiting for them.

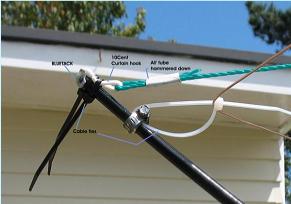
The bluetack keeps the water out. There is no drain hole in the tubes!
The thick ali tube used as rope crimp is about an inch long and hammered down - with care. The inside ends are countersunk to remove sharp edges. Test them.
The thick ali tube used as rope crimp is about an inch long and hammered down - with care. The inside ends are countersunk to remove sharp edges. Test them.
The RG213 goes up inside the tube and loops thru' 180degs to connect the 20mtr feed first. A plastic bag is stretched over the loop to cover the hole in the pipe. (in case it matters!)
The radial cords from the tips of each spreader are fixed to holes in a ring on the pipe. The ring is made of $2 shop chopping board,useful stuff.
The radial cords from the tips of each spreader are fixed to holes in a ring on the pipe. The ring is made of $2 shop chopping board,useful stuff.

Click the pics!
Half way through making a split collar for the guy lines. This saved $65. I needed the exercise too!
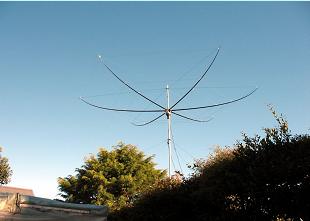
Hexbeams look great! It has all ready stood a really stiff breeze at 24 feet. I can lower it if a big one comes along but it seems quite well behaved. The SWR is almost perfect across each band. Overall, it is very satisfying.

The green 3mm cords take the stress from the fibre glass spreaders as they bend upwards.
They all need to be the same length and I recall that mine needed to be just over ten feet. Standing on the steps to reach the top of the center pipe allows two diametrically opposite cords to be pulled into place and hooked to the center ring. The pipe in the middle then stays vertical.....and there is every chance of good symmetry when all six are joined. I cannot recommend pulling two diametrically opposite tensioned cords together equally whilst tying two good knots at the same length whilst standing on a step ladder. Make two first using hooks and/or loops. Adjust - make the rest identical. Then it's easy.
They all need to be the same length and I recall that mine needed to be just over ten feet. Standing on the steps to reach the top of the center pipe allows two diametrically opposite cords to be pulled into place and hooked to the center ring. The pipe in the middle then stays vertical.....and there is every chance of good symmetry when all six are joined. I cannot recommend pulling two diametrically opposite tensioned cords together equally whilst tying two good knots at the same length whilst standing on a step ladder. Make two first using hooks and/or loops. Adjust - make the rest identical. Then it's easy.
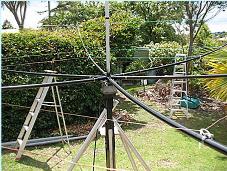
Ready to lift with the 1.66 mtr mast extensions nearby
Hub showing lots (lots) of paint on the dowling.
One more for luck.....and now with hindsight, place a visible marker somewhere on the antenna to make it easier to see which way it is pointing. White paint or coloured insulation would do the trick.
The retracted height just gives headroom and step ladder clearance so it can spin round easily for building etc.

Fifteen years ago I had the place to myself with room for tilt over masts, cubical quads, 36 foot booms full of yagis and even a 7 mtr dia dish. Now - neighbours houses and trees abound, 'hardly room for a vertical. 'Should be a law....... :-}
However, the broadband hexbeam clearly has much merit......
However, the broadband hexbeam clearly has much merit......


